Custom tags are a great way to label and filter mail according to your preferred criteria, such as company department, document type, or action to take. As the amount of mail in your account increases, you’ll be able to quickly access specific mail items using tags.
Creating Custom Tags
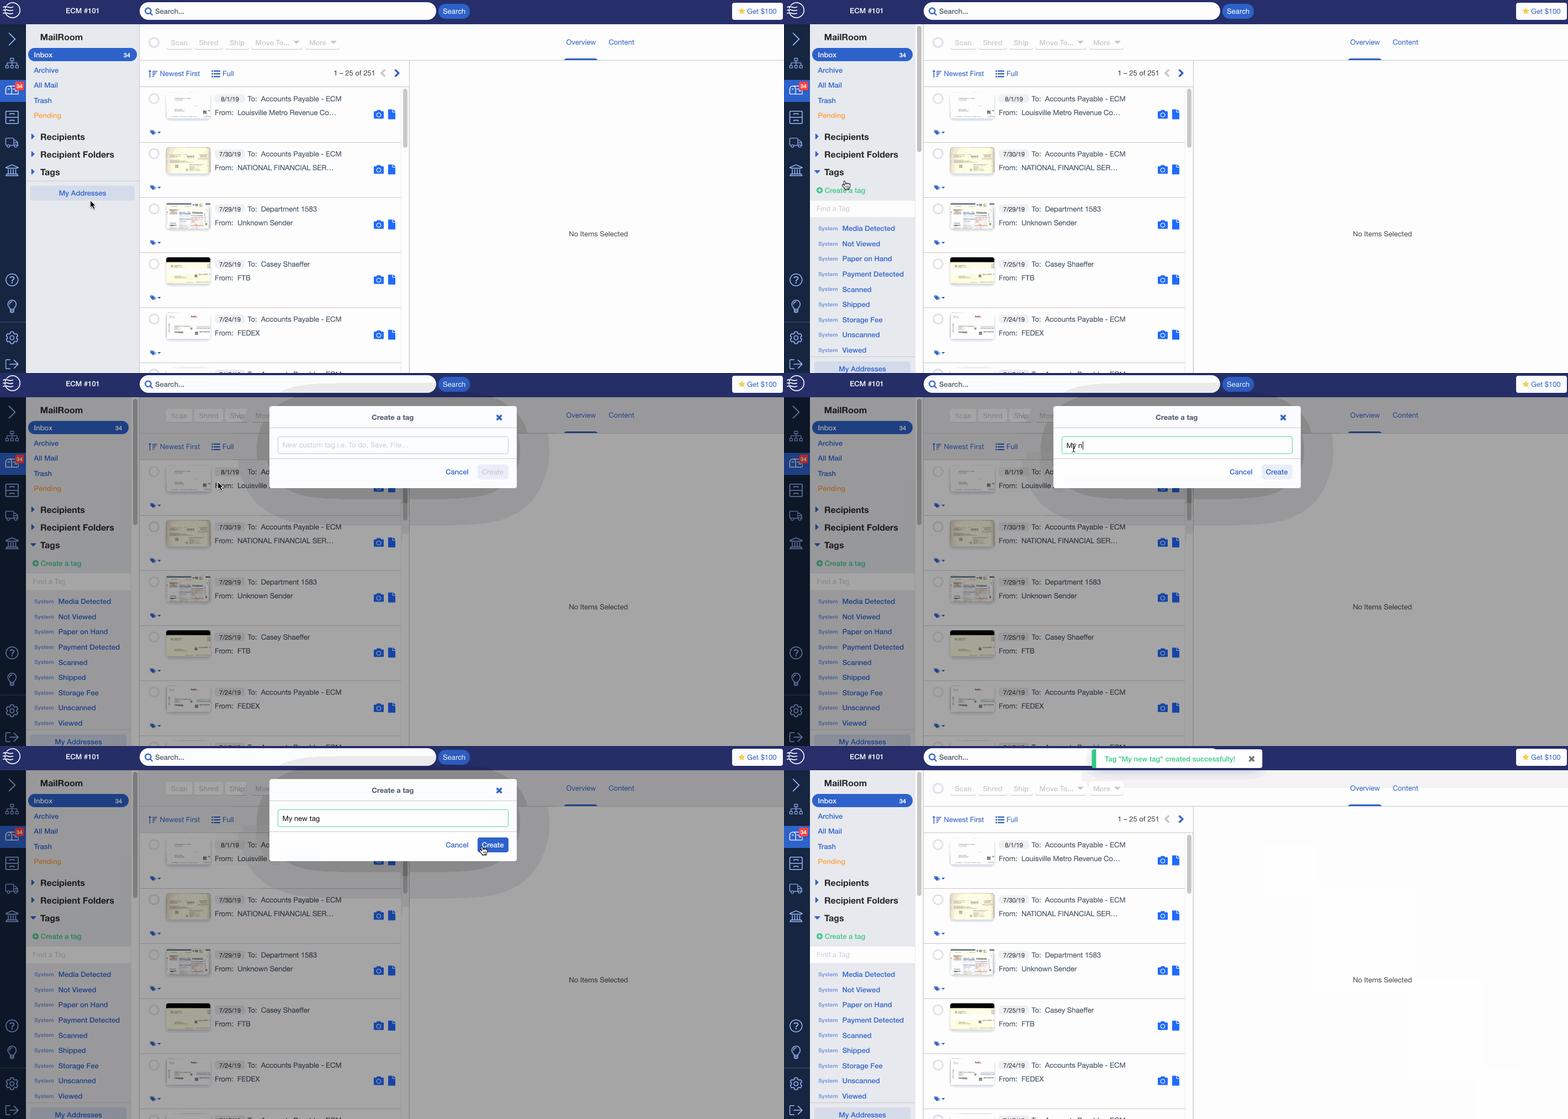
Click the Tags section on the lefthand sidebar and click “Create a tag”. Enter your desired tag name and select “Create”. Your tag will now appear in the Tags section.
Tagging Items
To tag an item with a tag, select an item so it is highlighted and click on the blue tag icon located beneath the envelope image. From the drop-down menu, select the custom tag you want to apply.
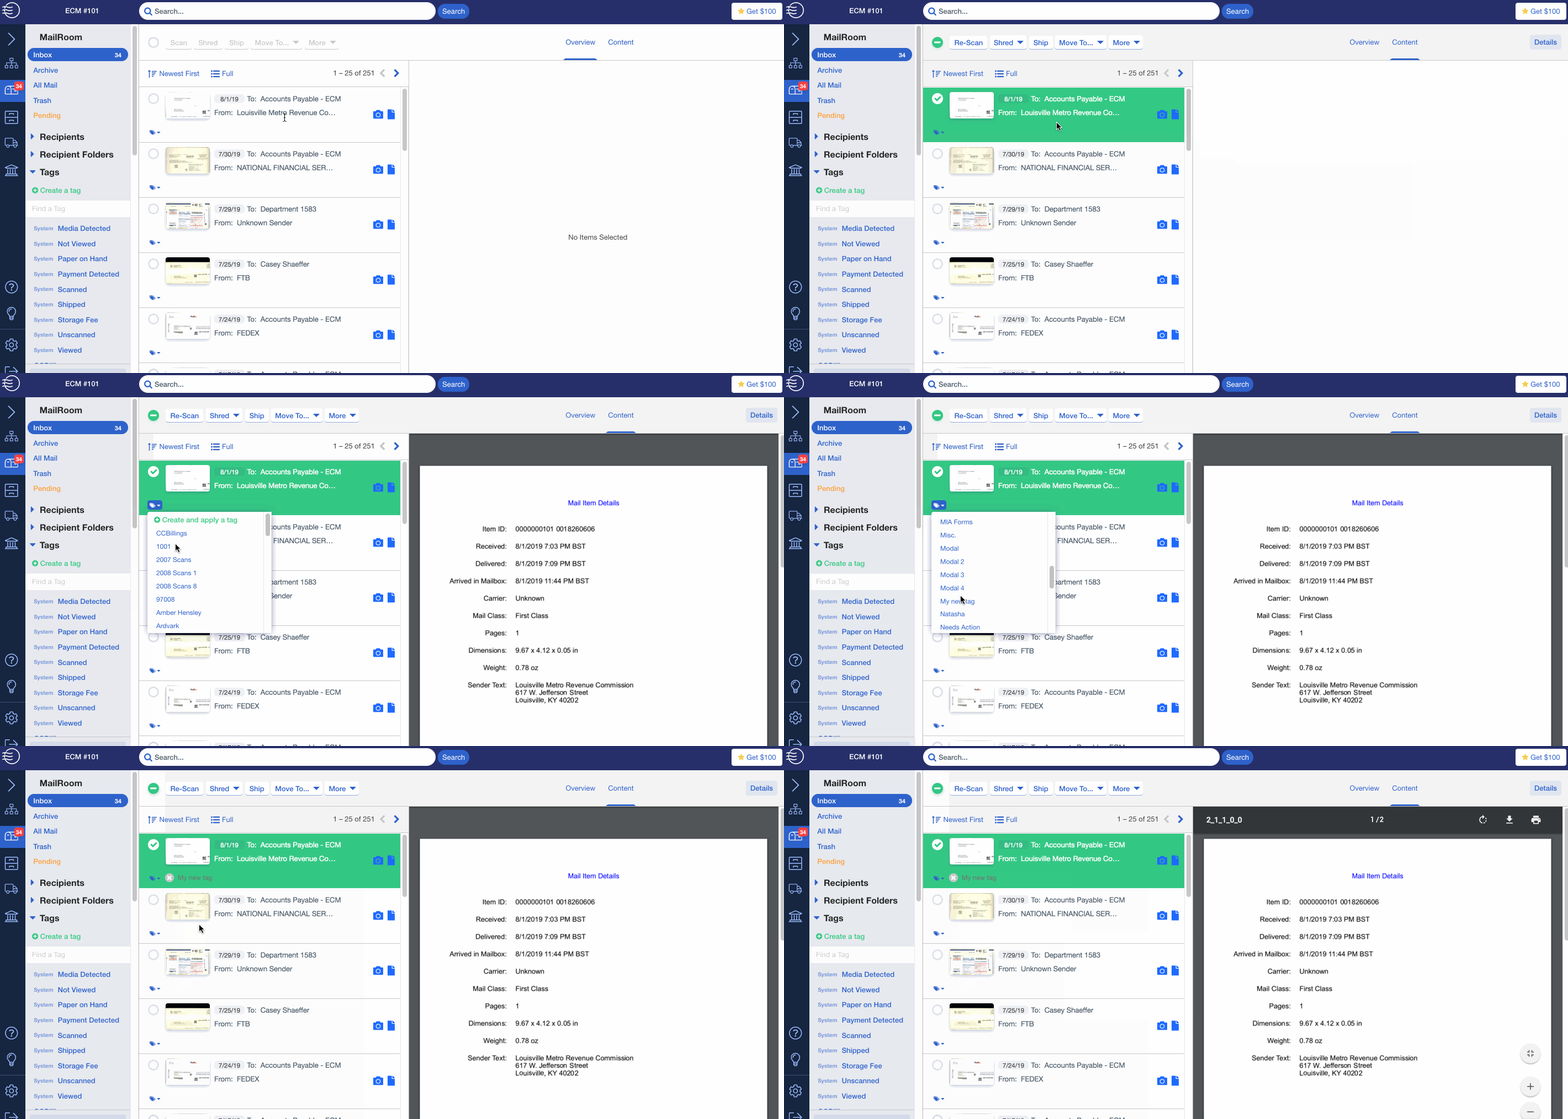
The tag will then appear beneath the envelope image. You may remove it at any time by selecting the “x” beside the tag.

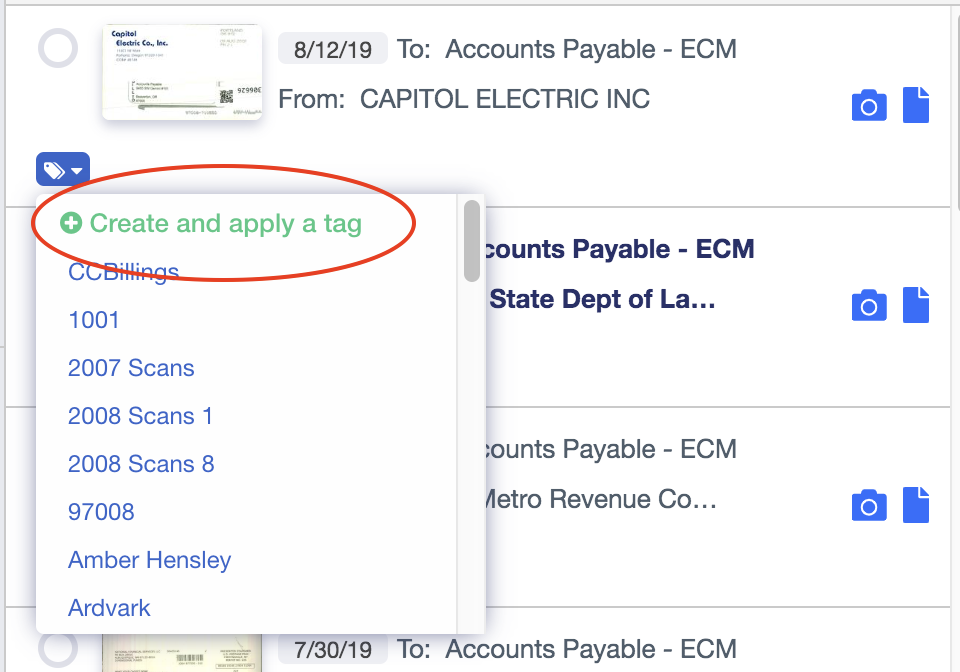
You can also create and apply a tag in one step by selecting an item, clicking the blue tag icon, and selecting the option to “Create and apply a tag”.
Filtering With Tags
Select a tag from your tags list and only mail items classified with that tag will be shown in your inbox. 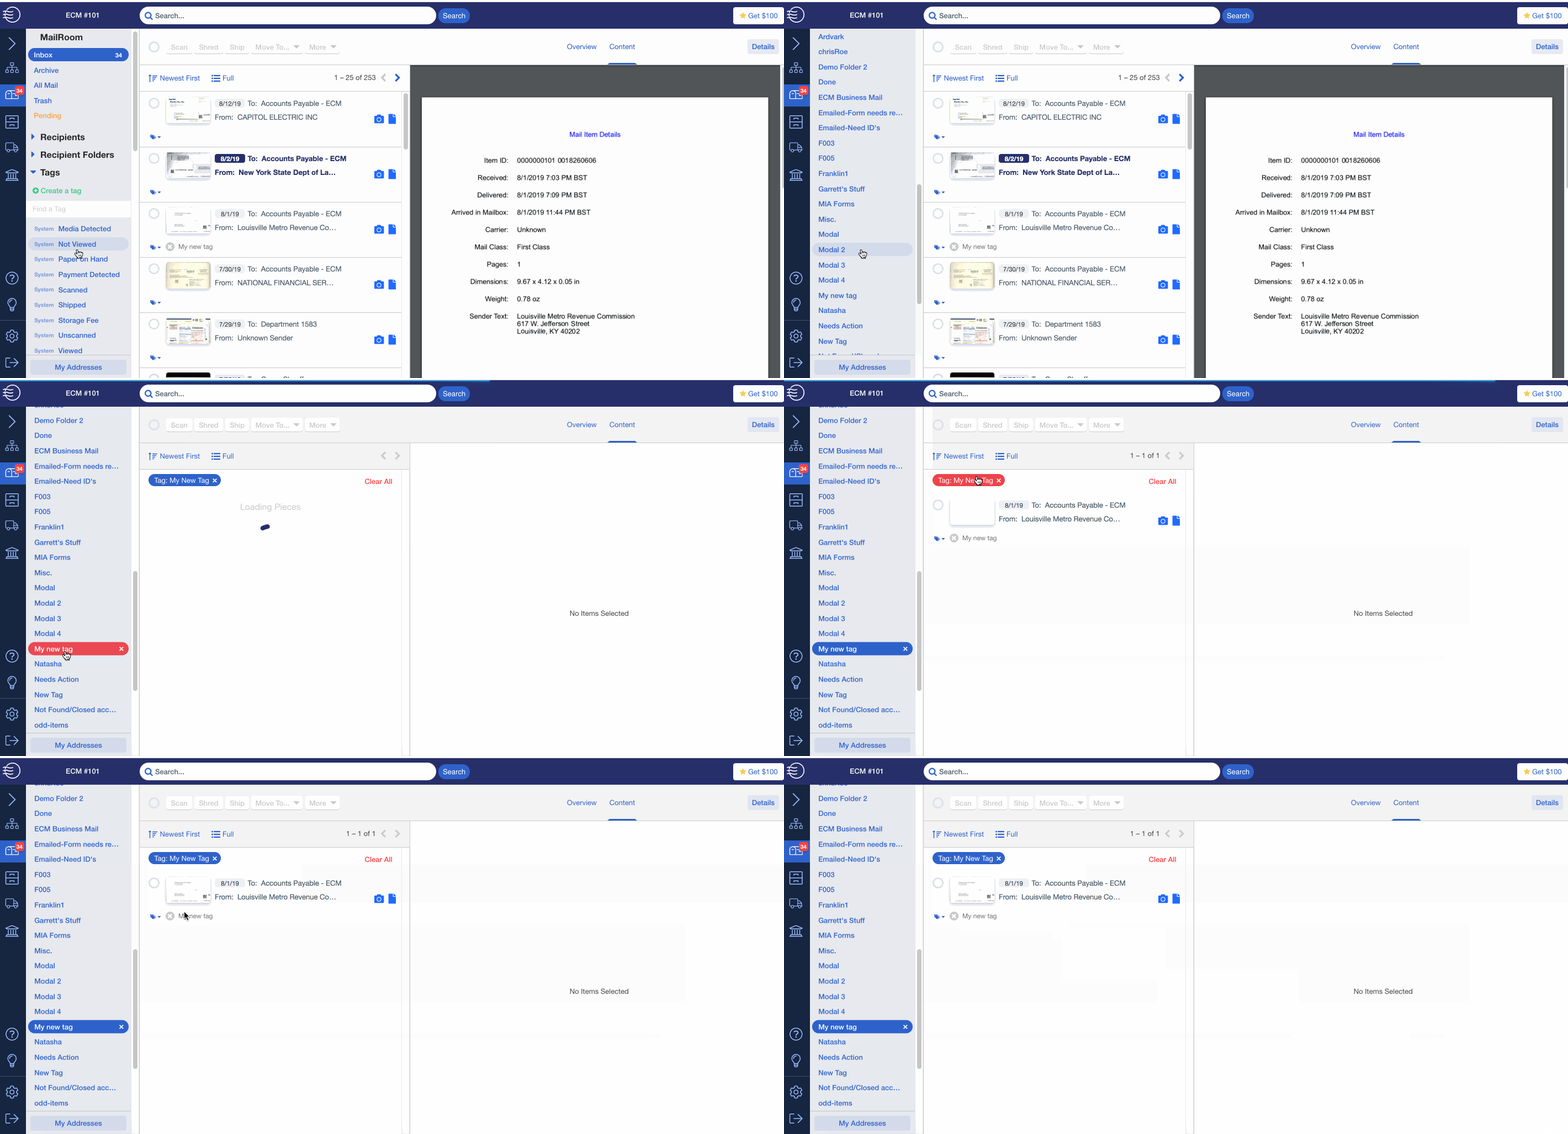
Note that our interface includes a number of system tags that automatically classify certain types of mail. The system tags may also be used to filter your inbox.
To learn more about filtering mail with tags, click here.
Deleting Tags
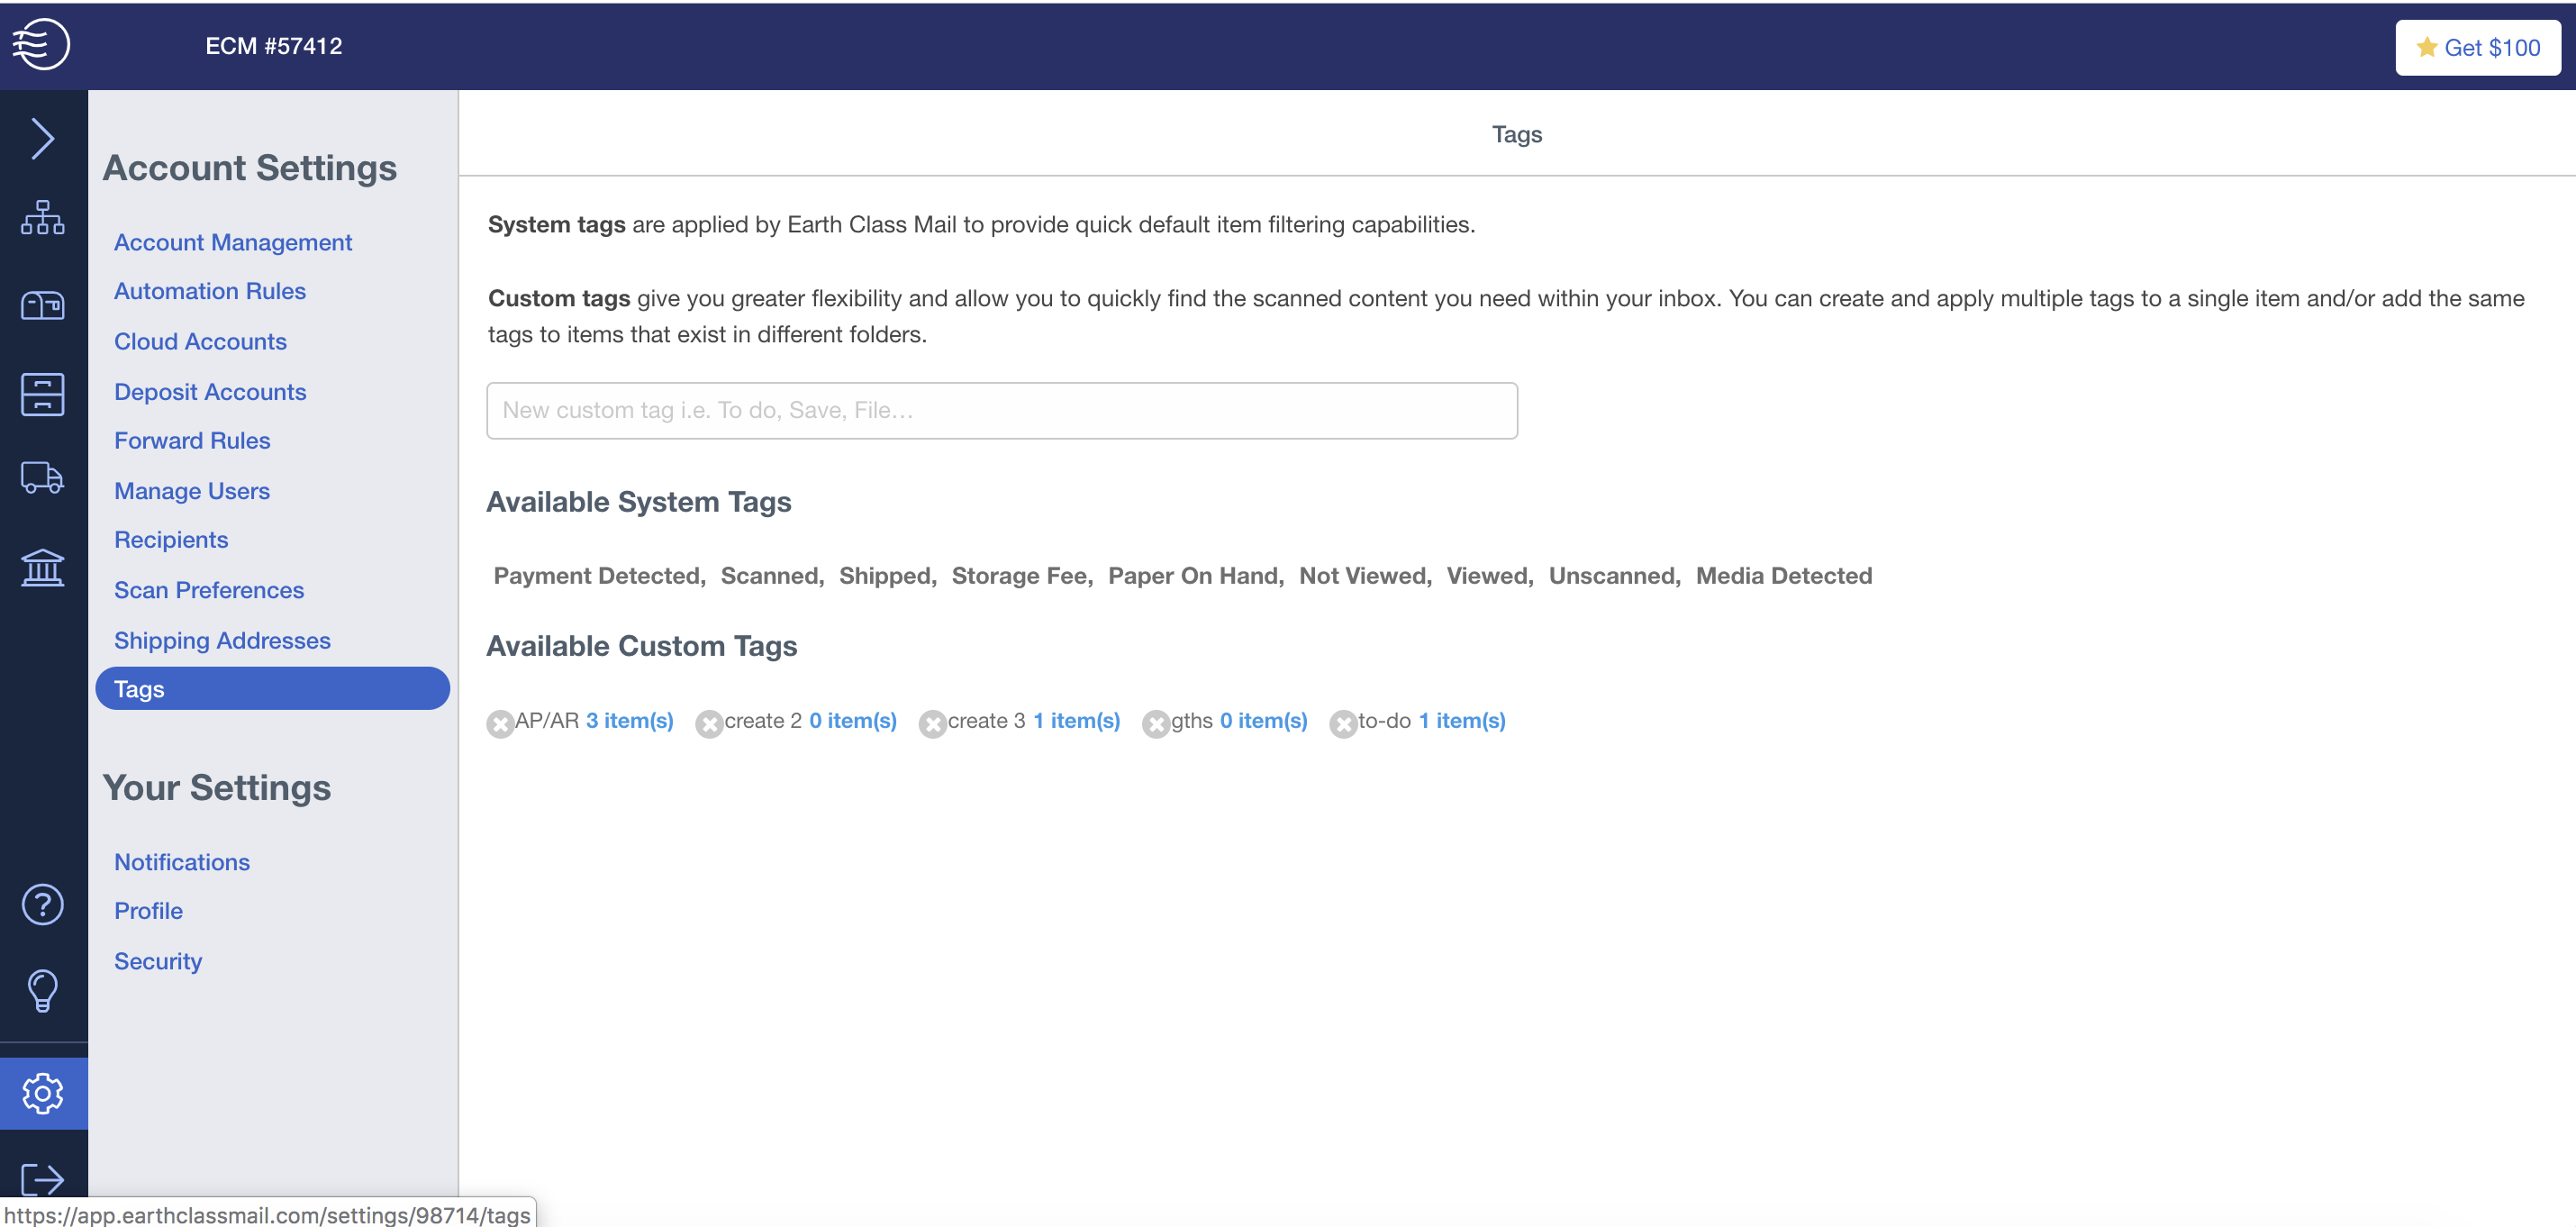
Custom tags can be deleted by navigating to Account Settings and then selecting the Tags tab. The number next to the tag indicates how many pieces of mail have been tagged. To delete the tag, simply click the "x" beside the tag.
Related